Connect to MSU-Secure on Windows 10
Follow these instructions to connect to the MSU-Secure wireless network on a Windows 10 device.
- Right-click/tap the Windows start menu.

- Select Control Panel > Network and Internet > Network and Sharing Center.
- Click Set up a new connection or network.
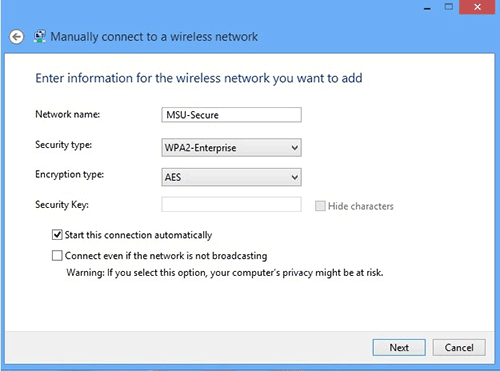
- Click Manually connect to a wireless network and then click Next.
- Enter the following information: (see image below)
- Network name: MSU-Secure
- Security type: WPA2-Enterprise
- Security key: Leave blank
- Check box - Start this connection automatically
- Click Next.
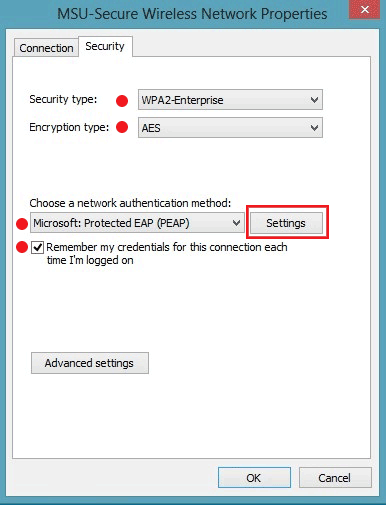
- Click Change connection settings.
- Click Security tab.
(see image below for steps 8 - 10) - Ensure authentication method is set to: Microsoft: Protected EAP (PEAP) and box is checked next to Remember my credentials...
- Click Settings button.
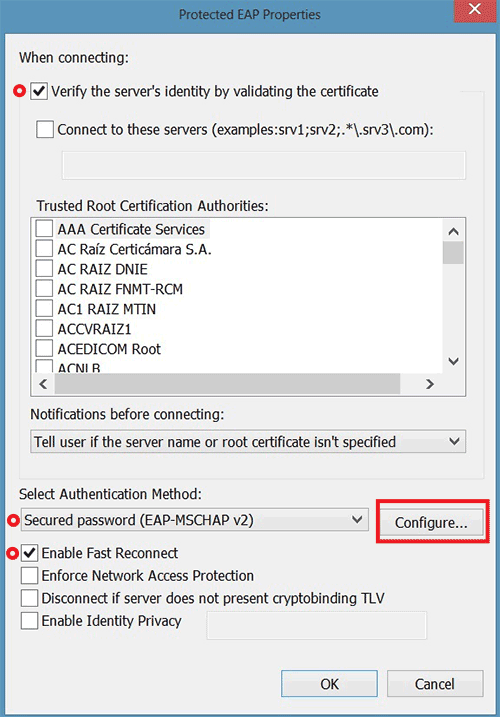
- Ensure Verify the server's identity by validating the certificate is checked.
(see image below for steps 11 - 13.) - Ensure Select Authentication Method is set to EAP-MSCHAP v2 and Enable Fast Reconnect is checked.
- Click Configure.
- Uncheck box next to Automatically use my Windows logon name and password (and domain if any)
and click OK.

- Click OK again.
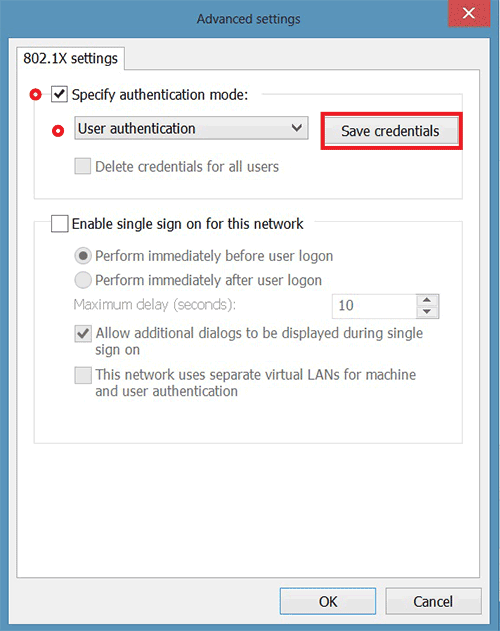
- Click Advanced Settings.
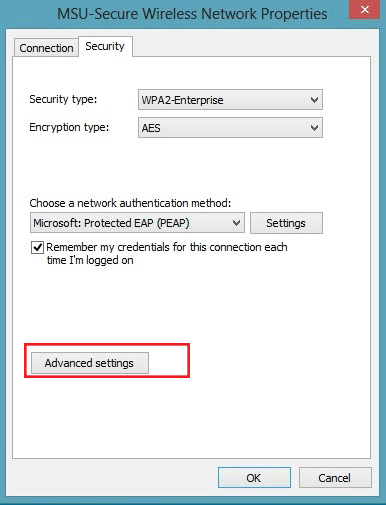
- Check box next to Specify authentication mode: (see image below for steps 17, 18).
- Select User authentication and click Save credentials.
- Enter:
- User name: msu\netid (for example, msu\a11b222)
- Password; netid password
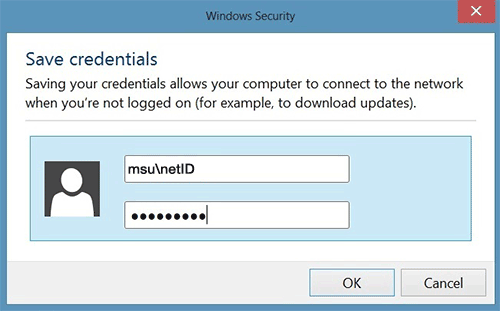
- Click OK and again on the remaining prompts to close windows.
- Click Close.
You should now be connected to MSU-Secure and in the future you device will connect to MSU-Secure automatically.
