Turnitin Online Grading
Use "Online Grading" with Turnitin to create a bank of QuickMarks to make repetitive tasks recede.
Make sure that "Online Grading" is enabled related to an assignment in Brightspace. See the Enable Turnitin in a Brightspace Course tutorial for more information. Users can elect to enable "Online Grading" only ("Similarity Report" functionality does not need to be enabled) as necessary.
Submit File (if necessary)
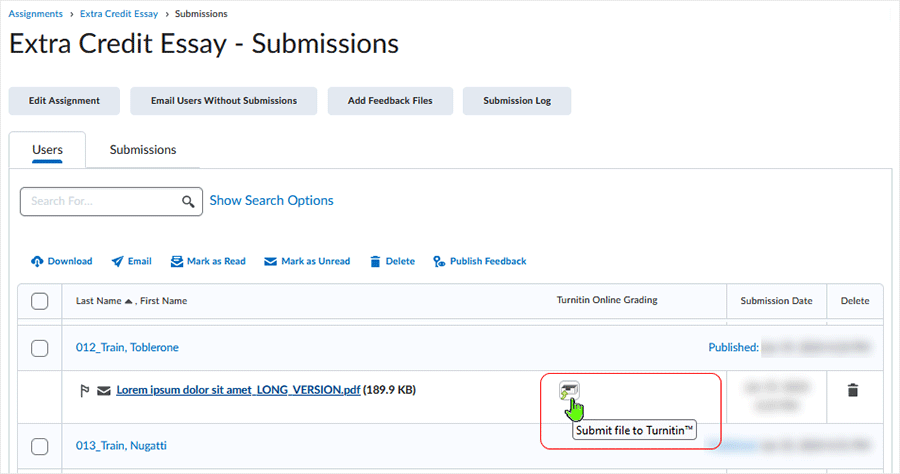
After accessing an assignment submission area in a course, If necessary, submit a file to Turnitin to activate "Online Grading" functionality.
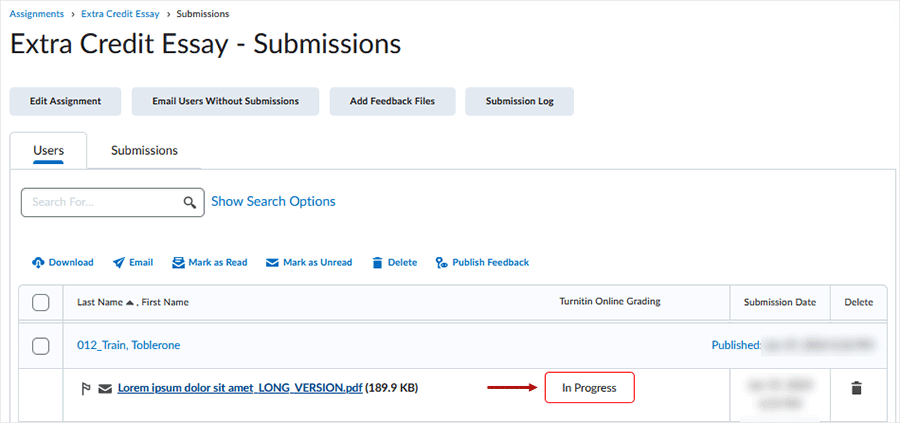
After the submission, the file will show as "In Progress" while it processes.
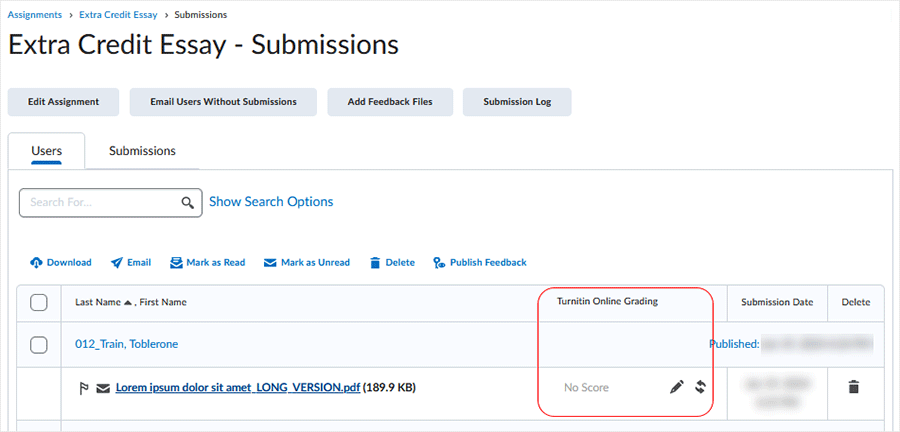
After the processing concludes, the "Turnitin Online Grading" shows with a No Score, pencil icon, and refresh icon.
Sometimes it takes a bit to process - if it seems too long, go back out to assignments and come back in.
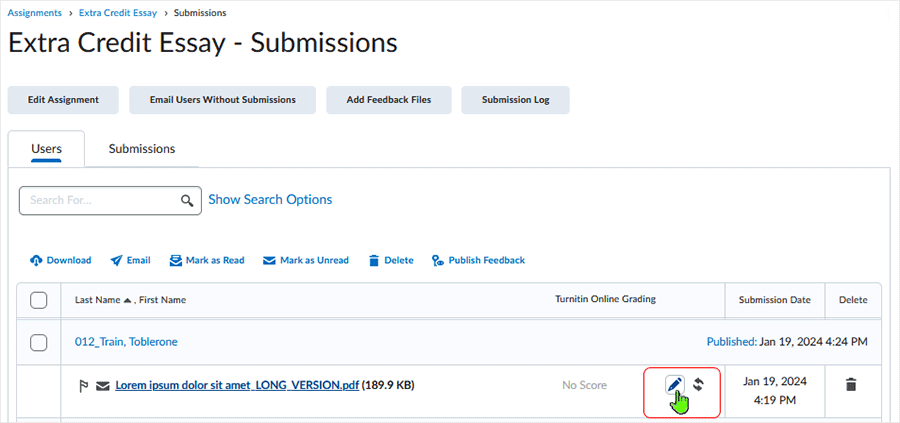
Select the pencil to access the "Feedback Studio" interface.
Create Quickmarks in Online Grading to markup documents
Selecting the pencil icon to access Online Grading will cause the "feedback studio" area to appear in a new tab.
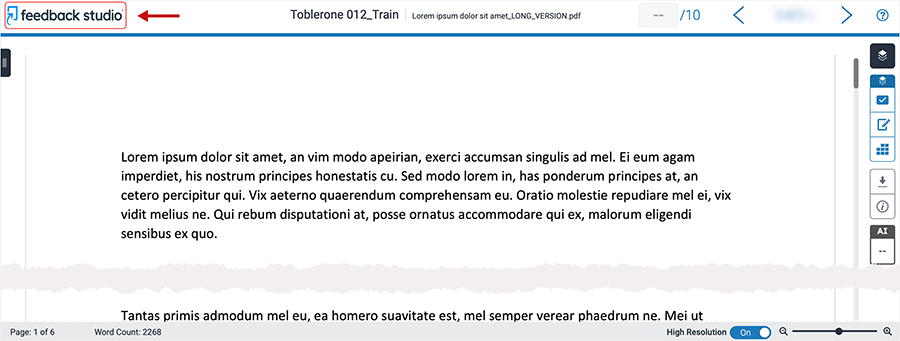
Use the "feedback studio" area to set up QuickMarks, make Comments, or write Inline text.
A selection box appears when clicking into the document.
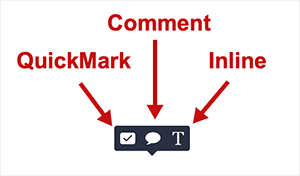
QuickMarks allow instructors to create a library of feedback that might be applicable, on multiple occasions, to multiple students, across multiple classes and assignments. A QuickMark may be a word or phrase, or may even be an abbreviation.
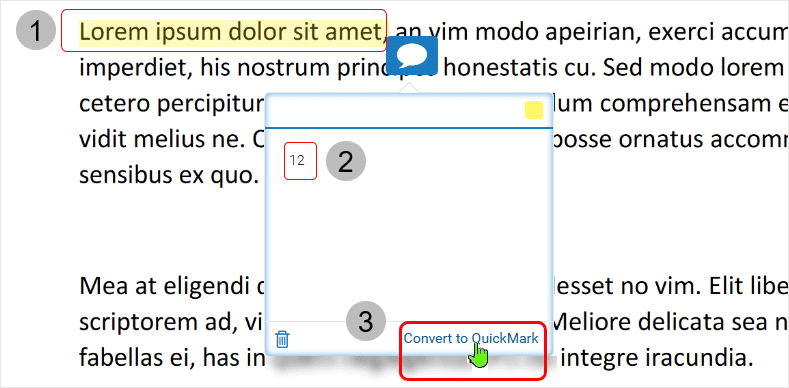
To add a QuickMark for repeated use, a user can select the "Comment" bubble, enter a comment, and convert it to a QuickMark.
In this example:
- A phrase has been highlighted in the text of the submission.
- Note: it is NOT necessary to select a phrase initially - selecting "Comment" (anywhere in the document) is enough.
- A comment has been added - in this case, the numeral "12" has been entered.
- Select "Convert to QuickMark" (lower left).
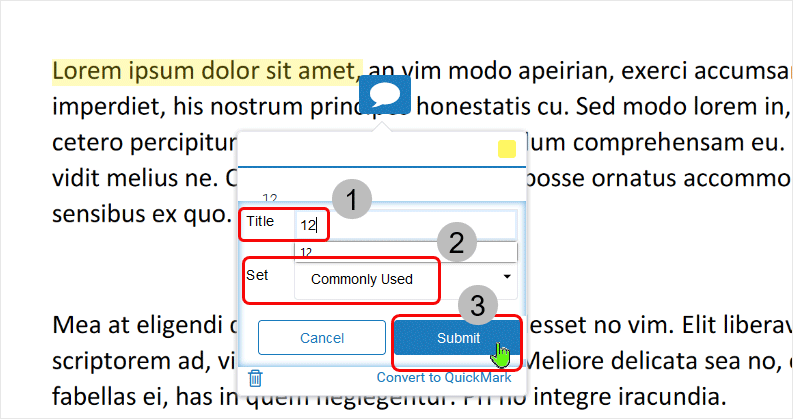
After "Convert to QuickMark" has been selected:
- A "Title" must be entered. In this case, the numeral "12" has been entered as the title of the QuickMark.
- A "Set" is selected. In this case, the default of "Commonly Used" is selected.
- Use the drop menu to select other sets as necessary.
- After Title and Set are established, select "Submit" for the comment to be turned into a reusable QuickMark.
To use the QuickMark in another area of the submission, highlight some text and select the QuickMark icon.

Select the QuickMark to be used.
- "Commonly Used" set is selected (by default).
- The QuickMark with the numeral "12" as the title is selected.

The QuickMark is in place. Selecting it allows the user to move it and re-position as necessary.

Transfer "feedback studio" point totals into Brightspace
Markup of the submission has taken place. In this case, QuickMarks have been added.
The user has assigned a point total in the points area.

After a point total has been recorded in the "feedback studio" area, user can transfer the point total to the overall grade of the assignment.
If necessary, access the learner submission by selecting the submission in the assignment submissions area.
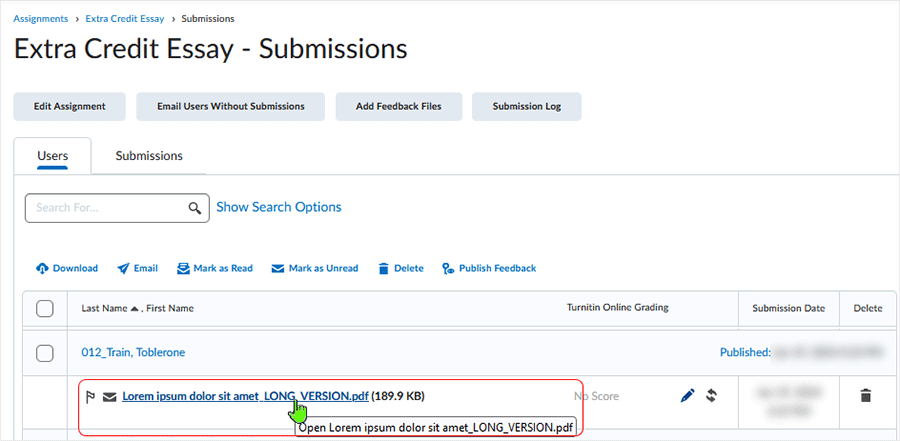
If the user submission is showing, select the "Back to User Submissions" button in the upper left to reveal the "Turnitin Online Grading" controls.

The user submission title and the "Turnitin Online Grading" control area displays with a "Use this Grade" button. Select the button to post the grade into the Brightspace "Overall Grade" area.
- Note that icons display affording information and functionality.
- Hover over the icons to find out information as necessary.
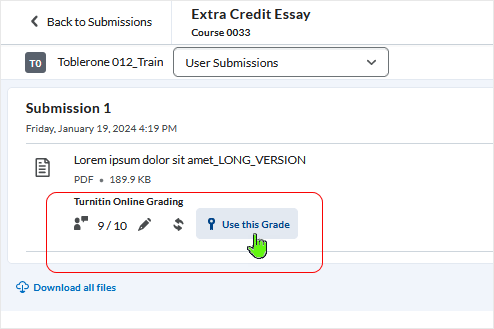
After selecting the "Use this Grade" button:
- The "Turnitin Online Grading" points (established in "feedback studio") are pushed over to the Brightspace "Overall Grade" area.
- Select "Publish" or "Update" as necessary to complete the evaluation process.

Note: dependent upon Turnitin setup related to the "Turnitin Online Grading" it may not be necessary to manually associate the "Turnitin Online Grading" with the Brightspace Overall Grade. During setup, a user may select automatic draft transfer.
Links will open in a new tab or window dependent on browser/OS configuration.
What dialog boxes look like and how dialog boxes and browsers interact is dependent upon the operating system and browser being used. The screenshots in this tutorial may differ from the screen that the user is viewing when performing actions described.
CD 202401
