
Forwarding Email from Outlook for Mac
Important: at this time, MacOS does not allow for rules to be added, deleted, or changed on the desktop or app version; to manage rules, access Outlook for the Web in your browser.
How to forward email from Outlook for Mac
- Open Outlook for the Web. (Learn how to access your web account at montana.edu/office365/mac-owe-setup)
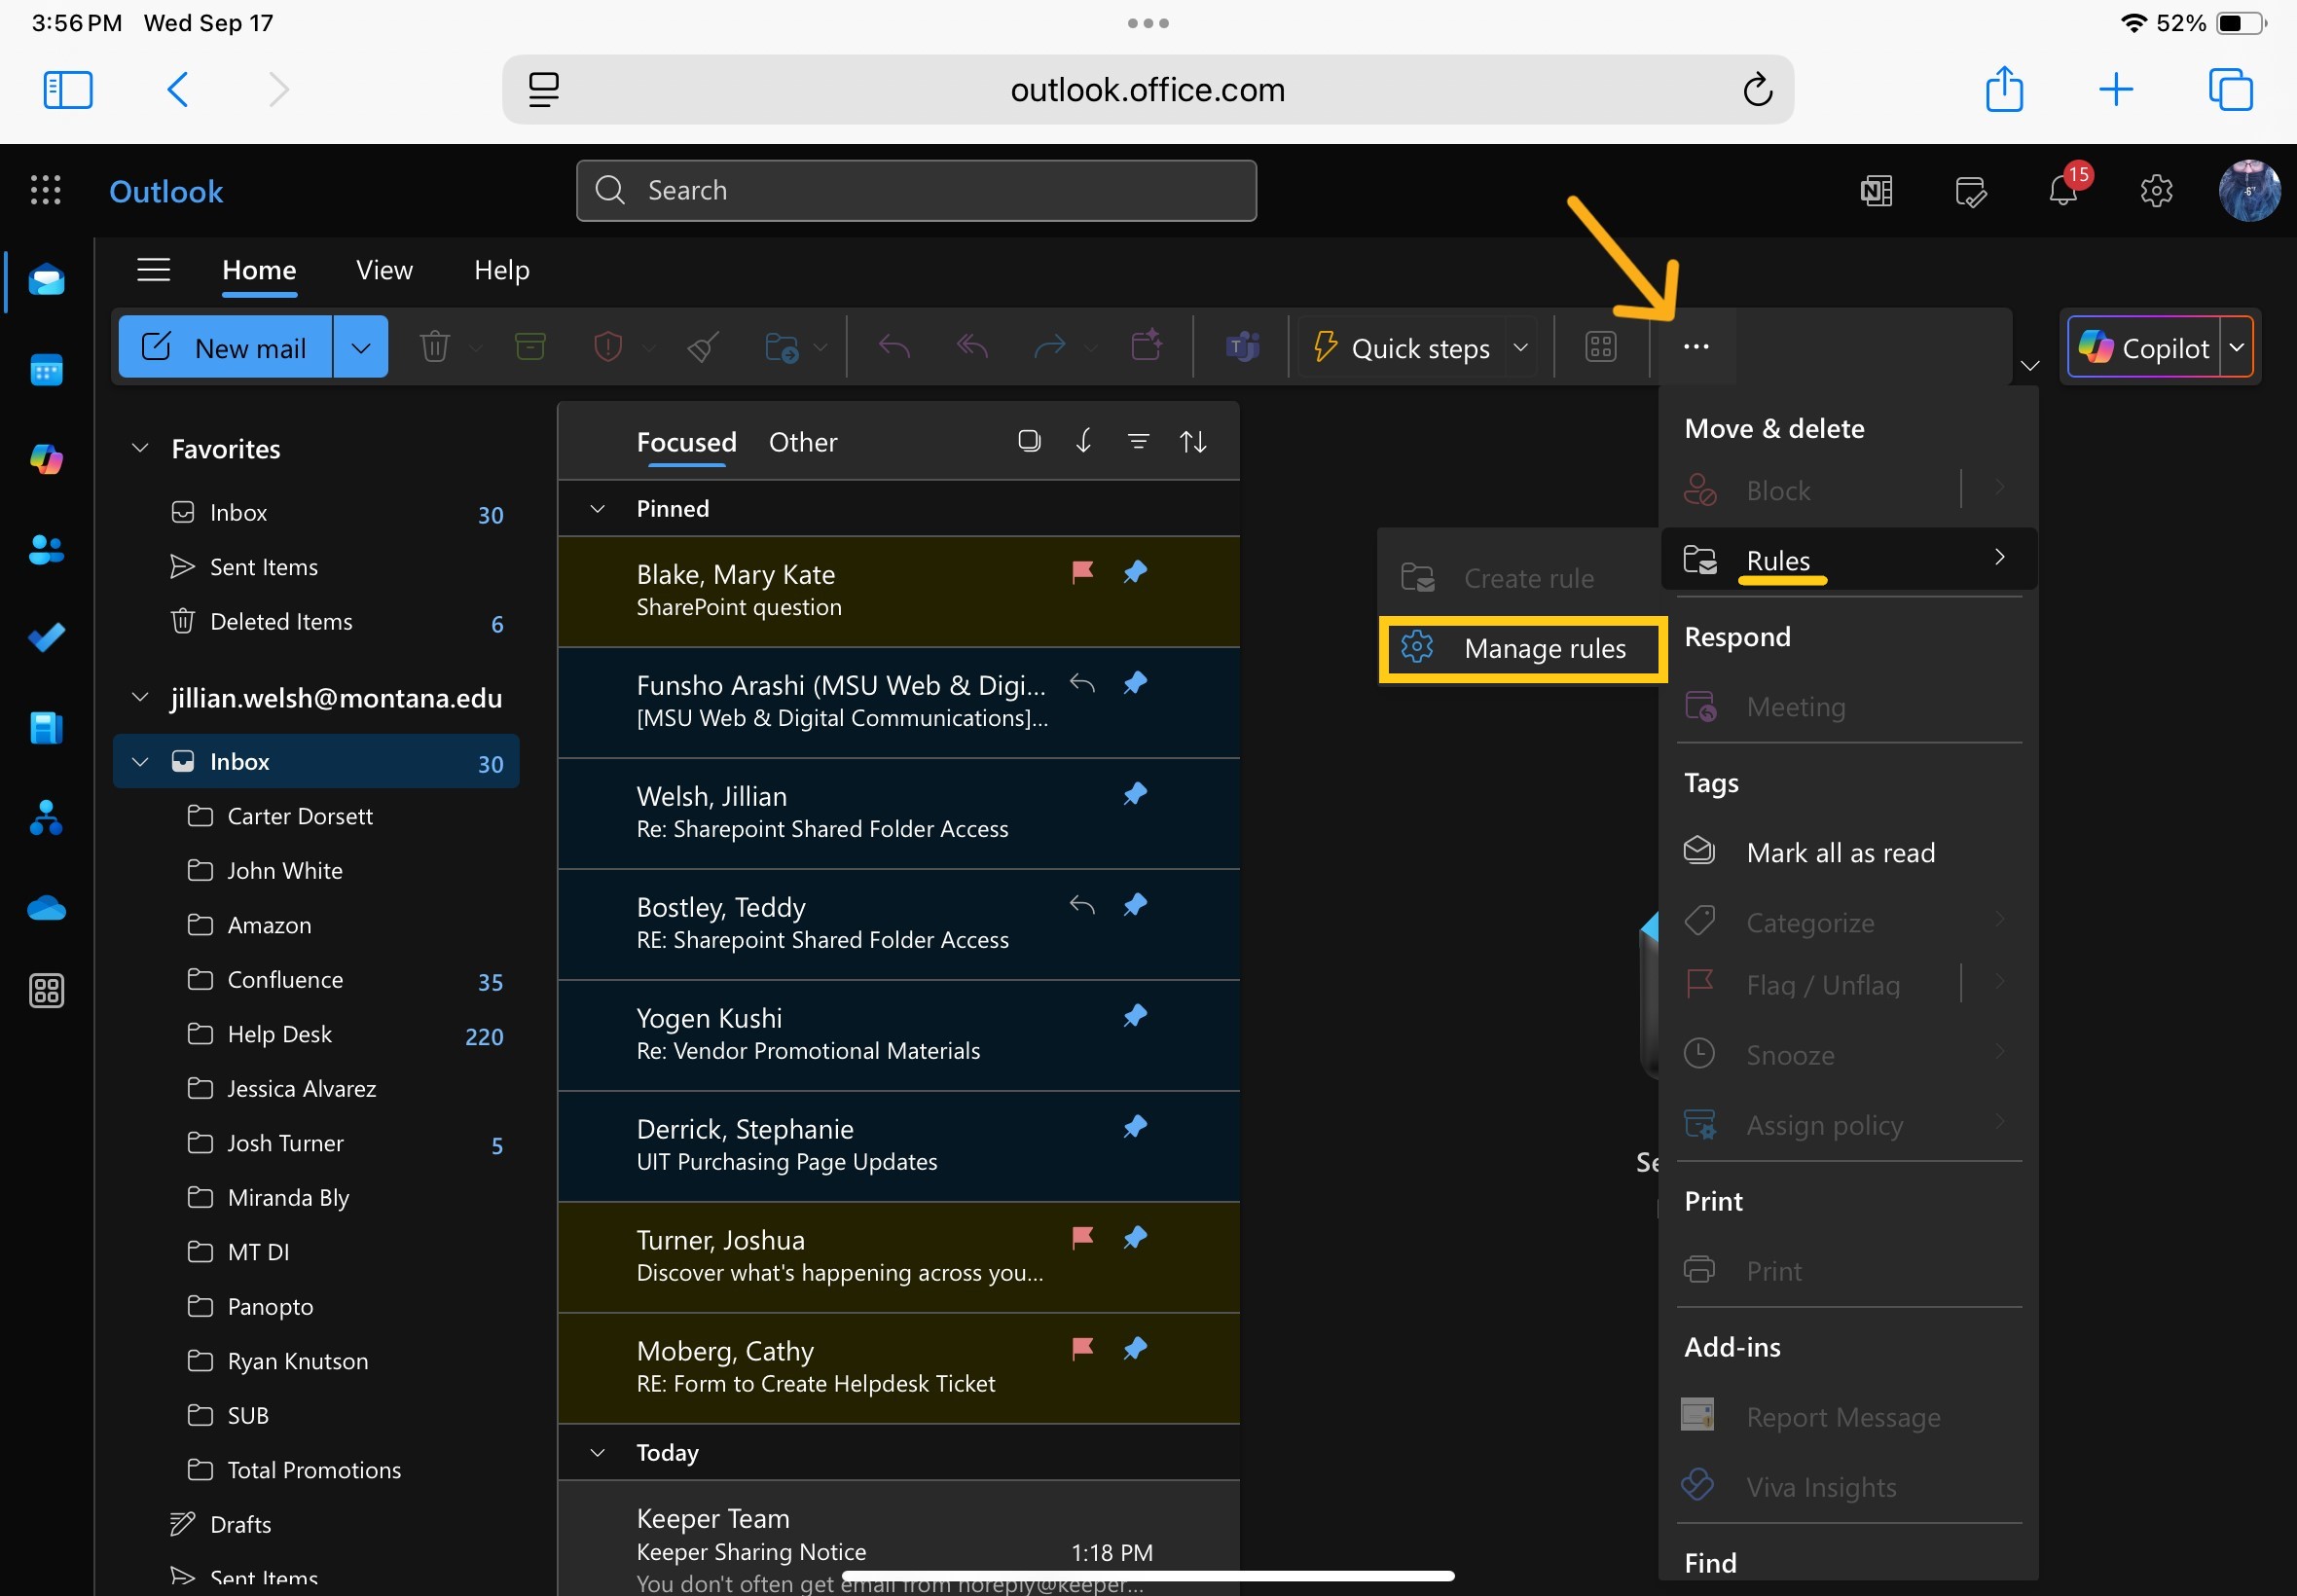
- While not in an email, click the three dots at the top right corner of the windowm (not to be confused with the three dots that
might appear near your icon). Hover over "Rules" and then select "Manage rules".
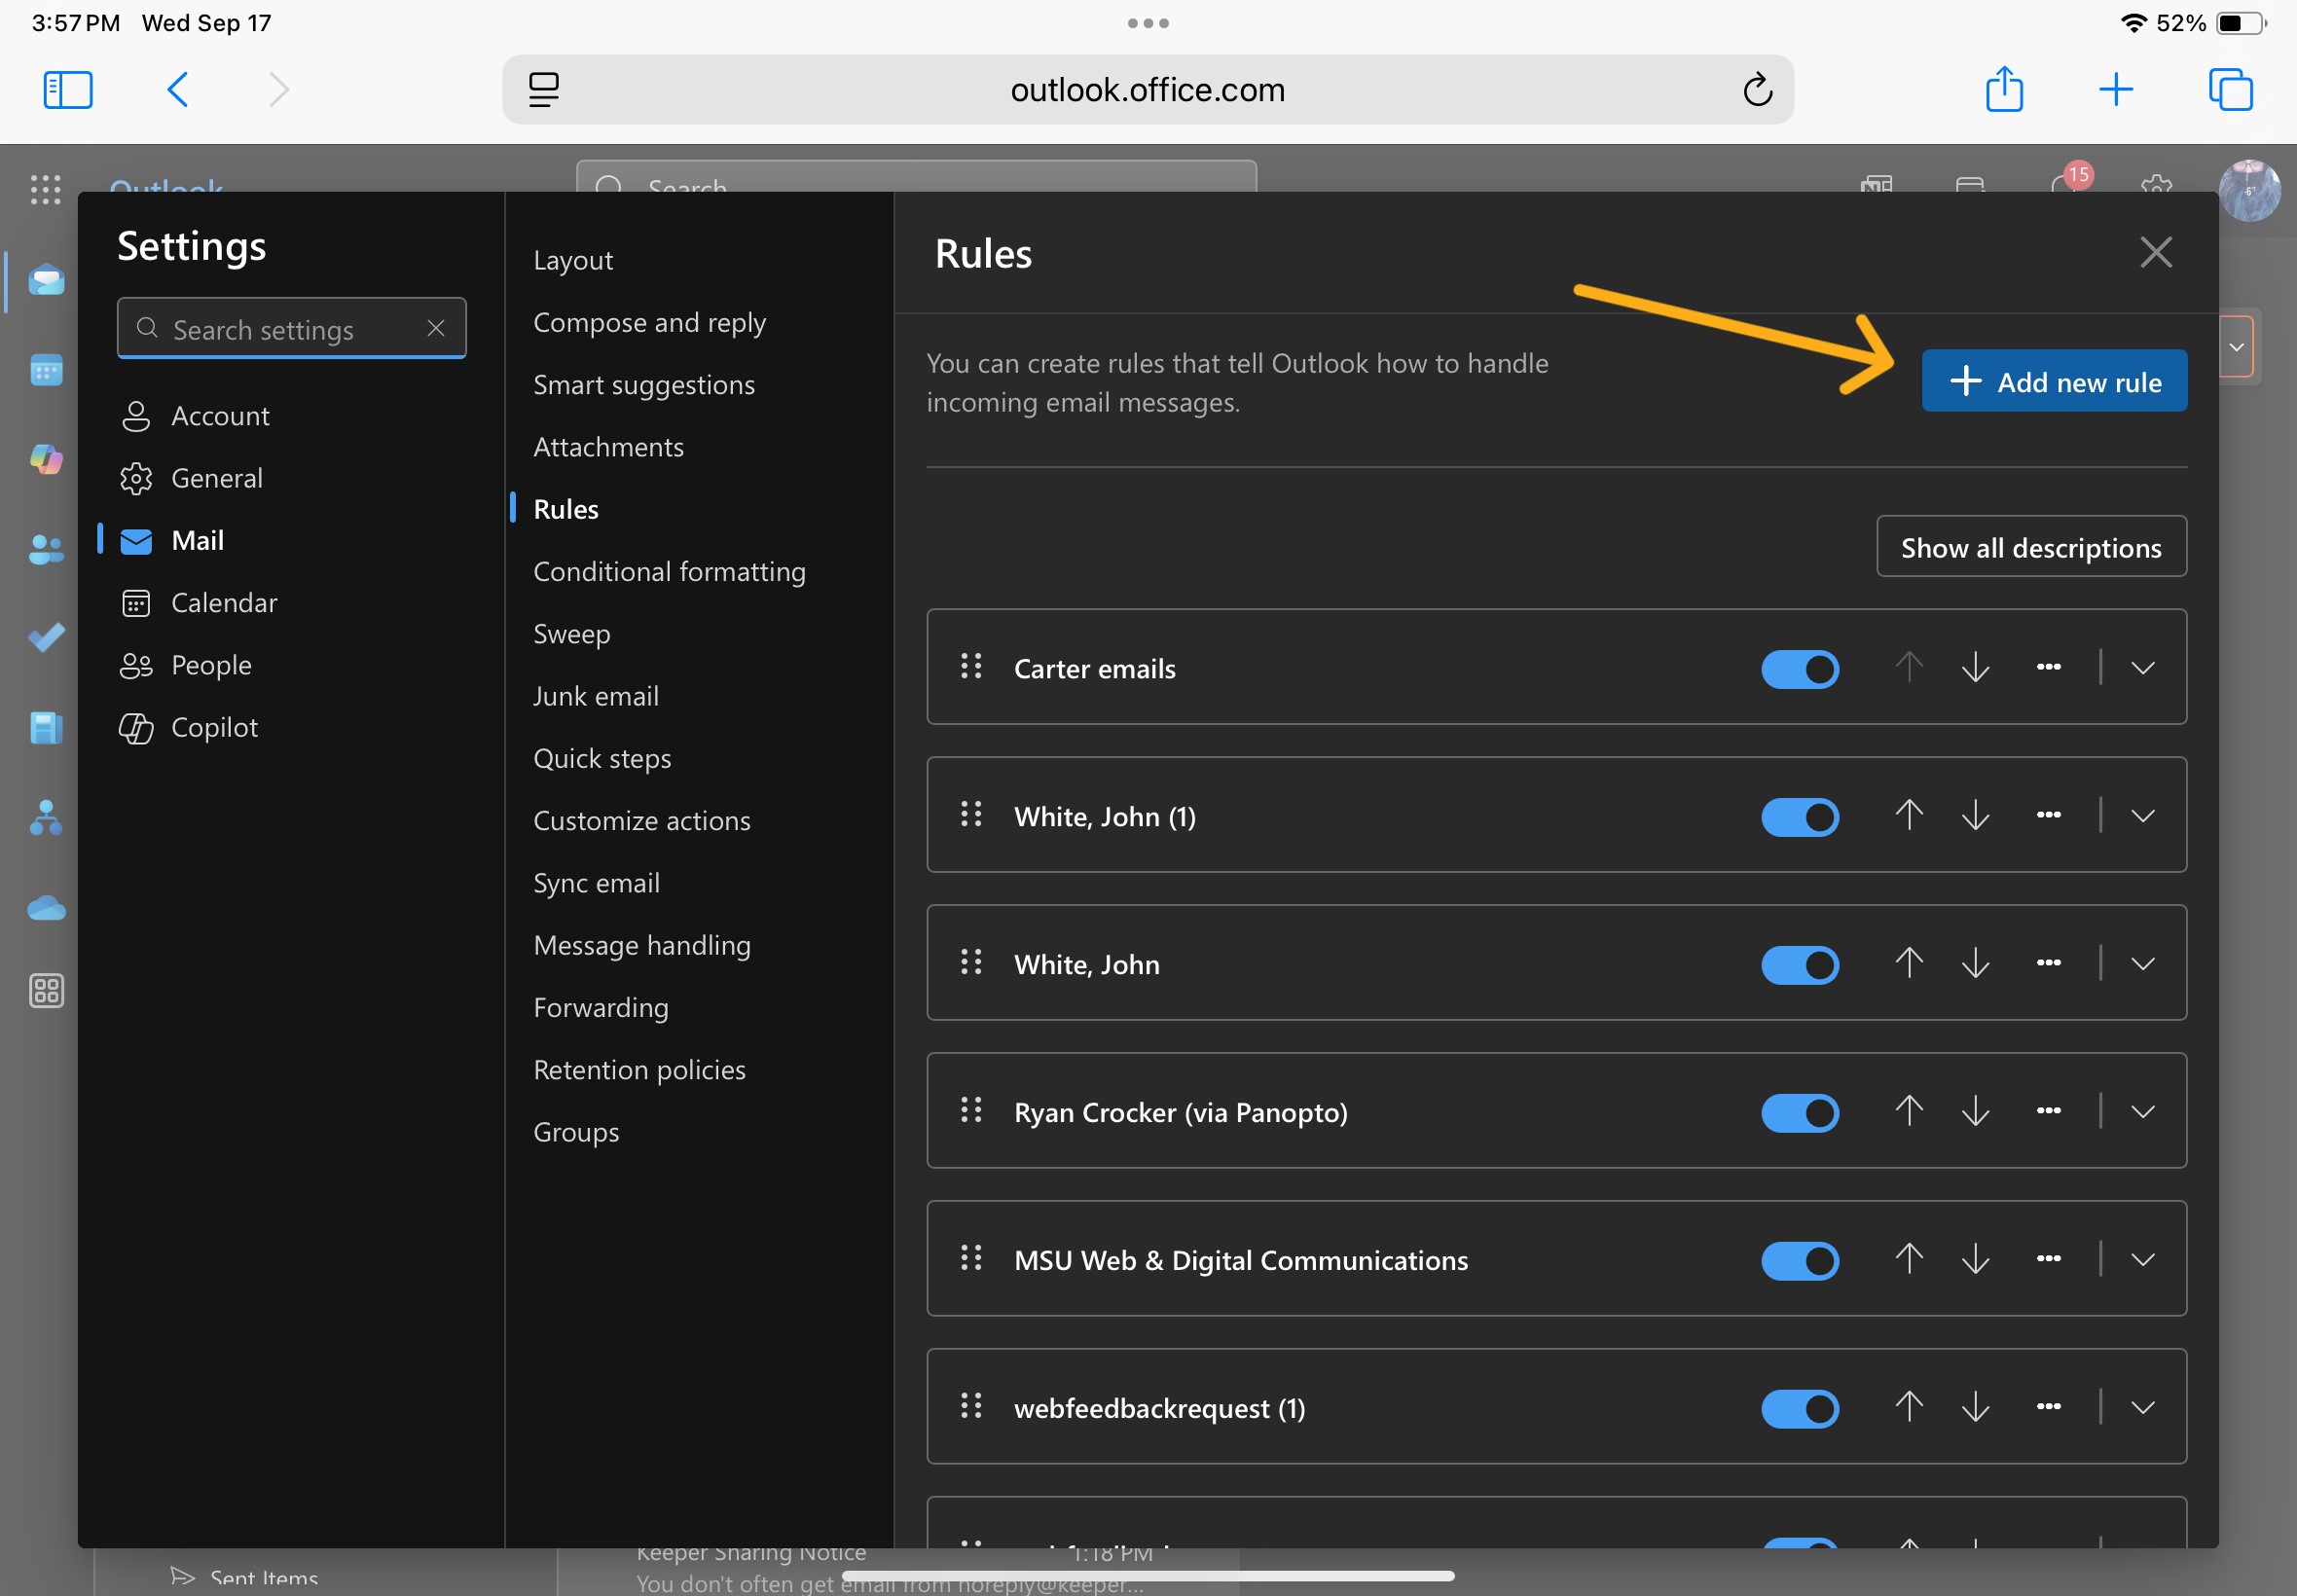
- In the Settings window that pops up, click on the "+ Add new rule" button.
- Where prompted in box 1, title your rule.
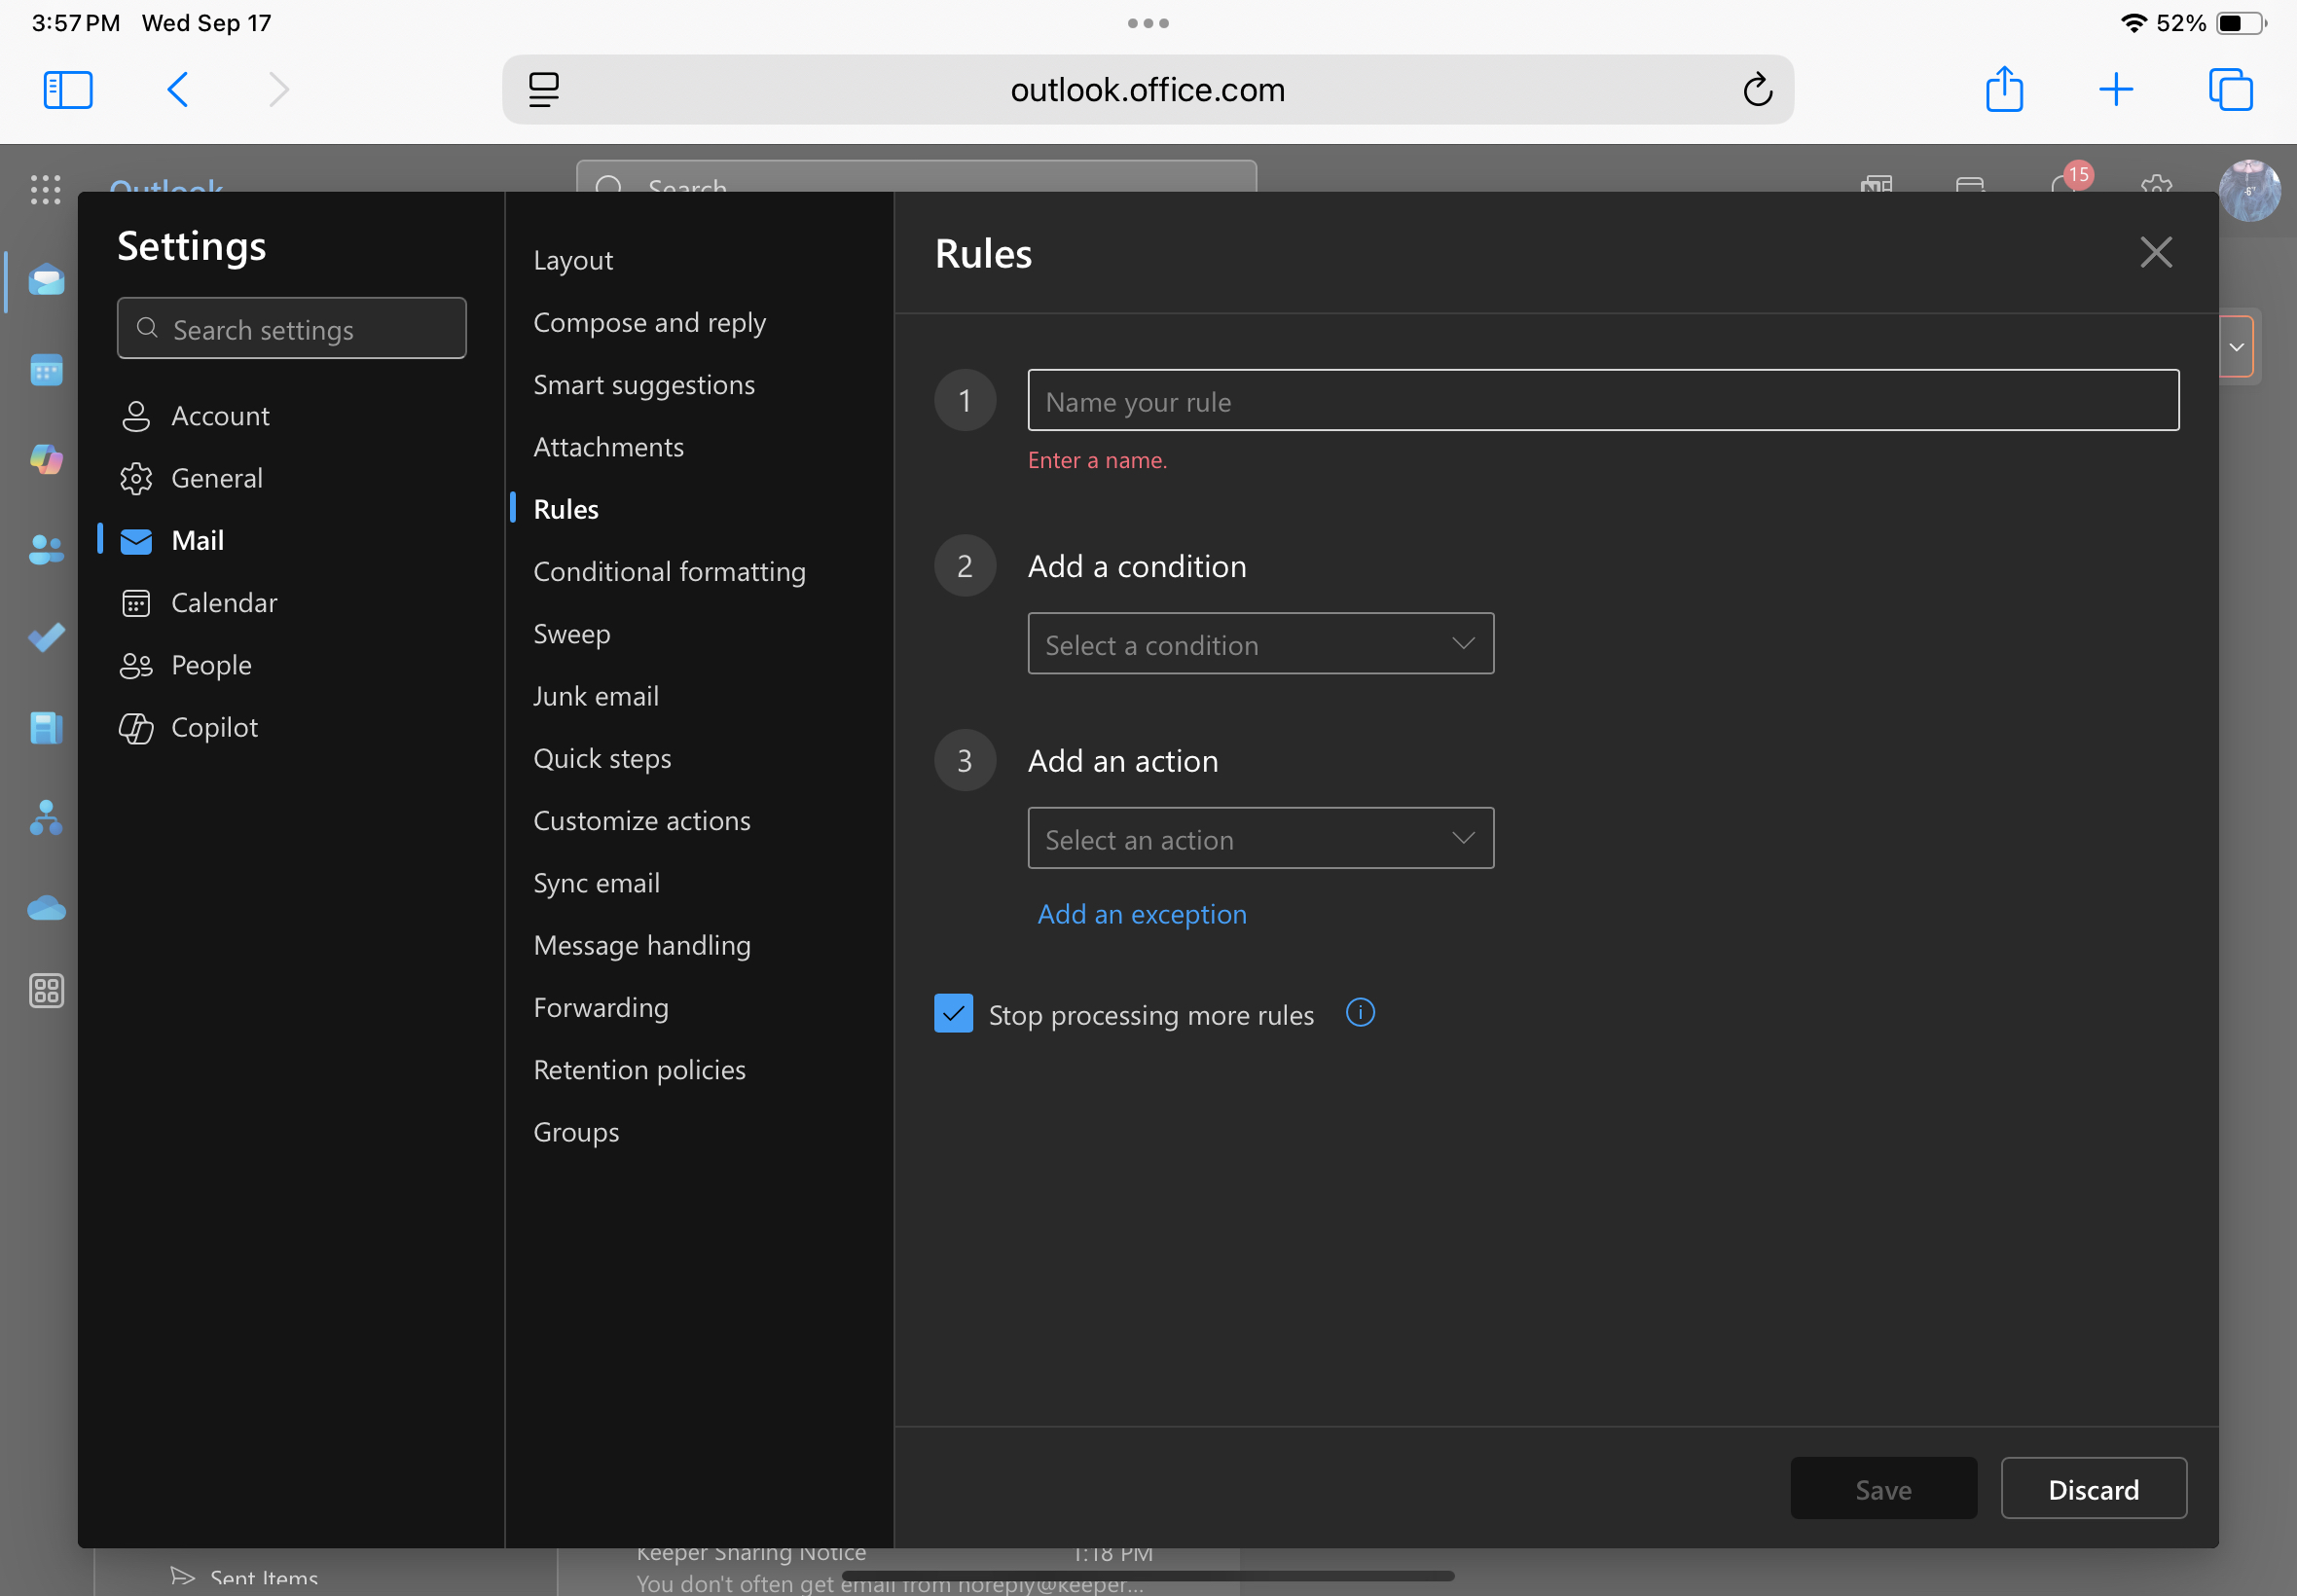
You can name the new rule whatever you want; we went with "Email Forwarding" to make it clear.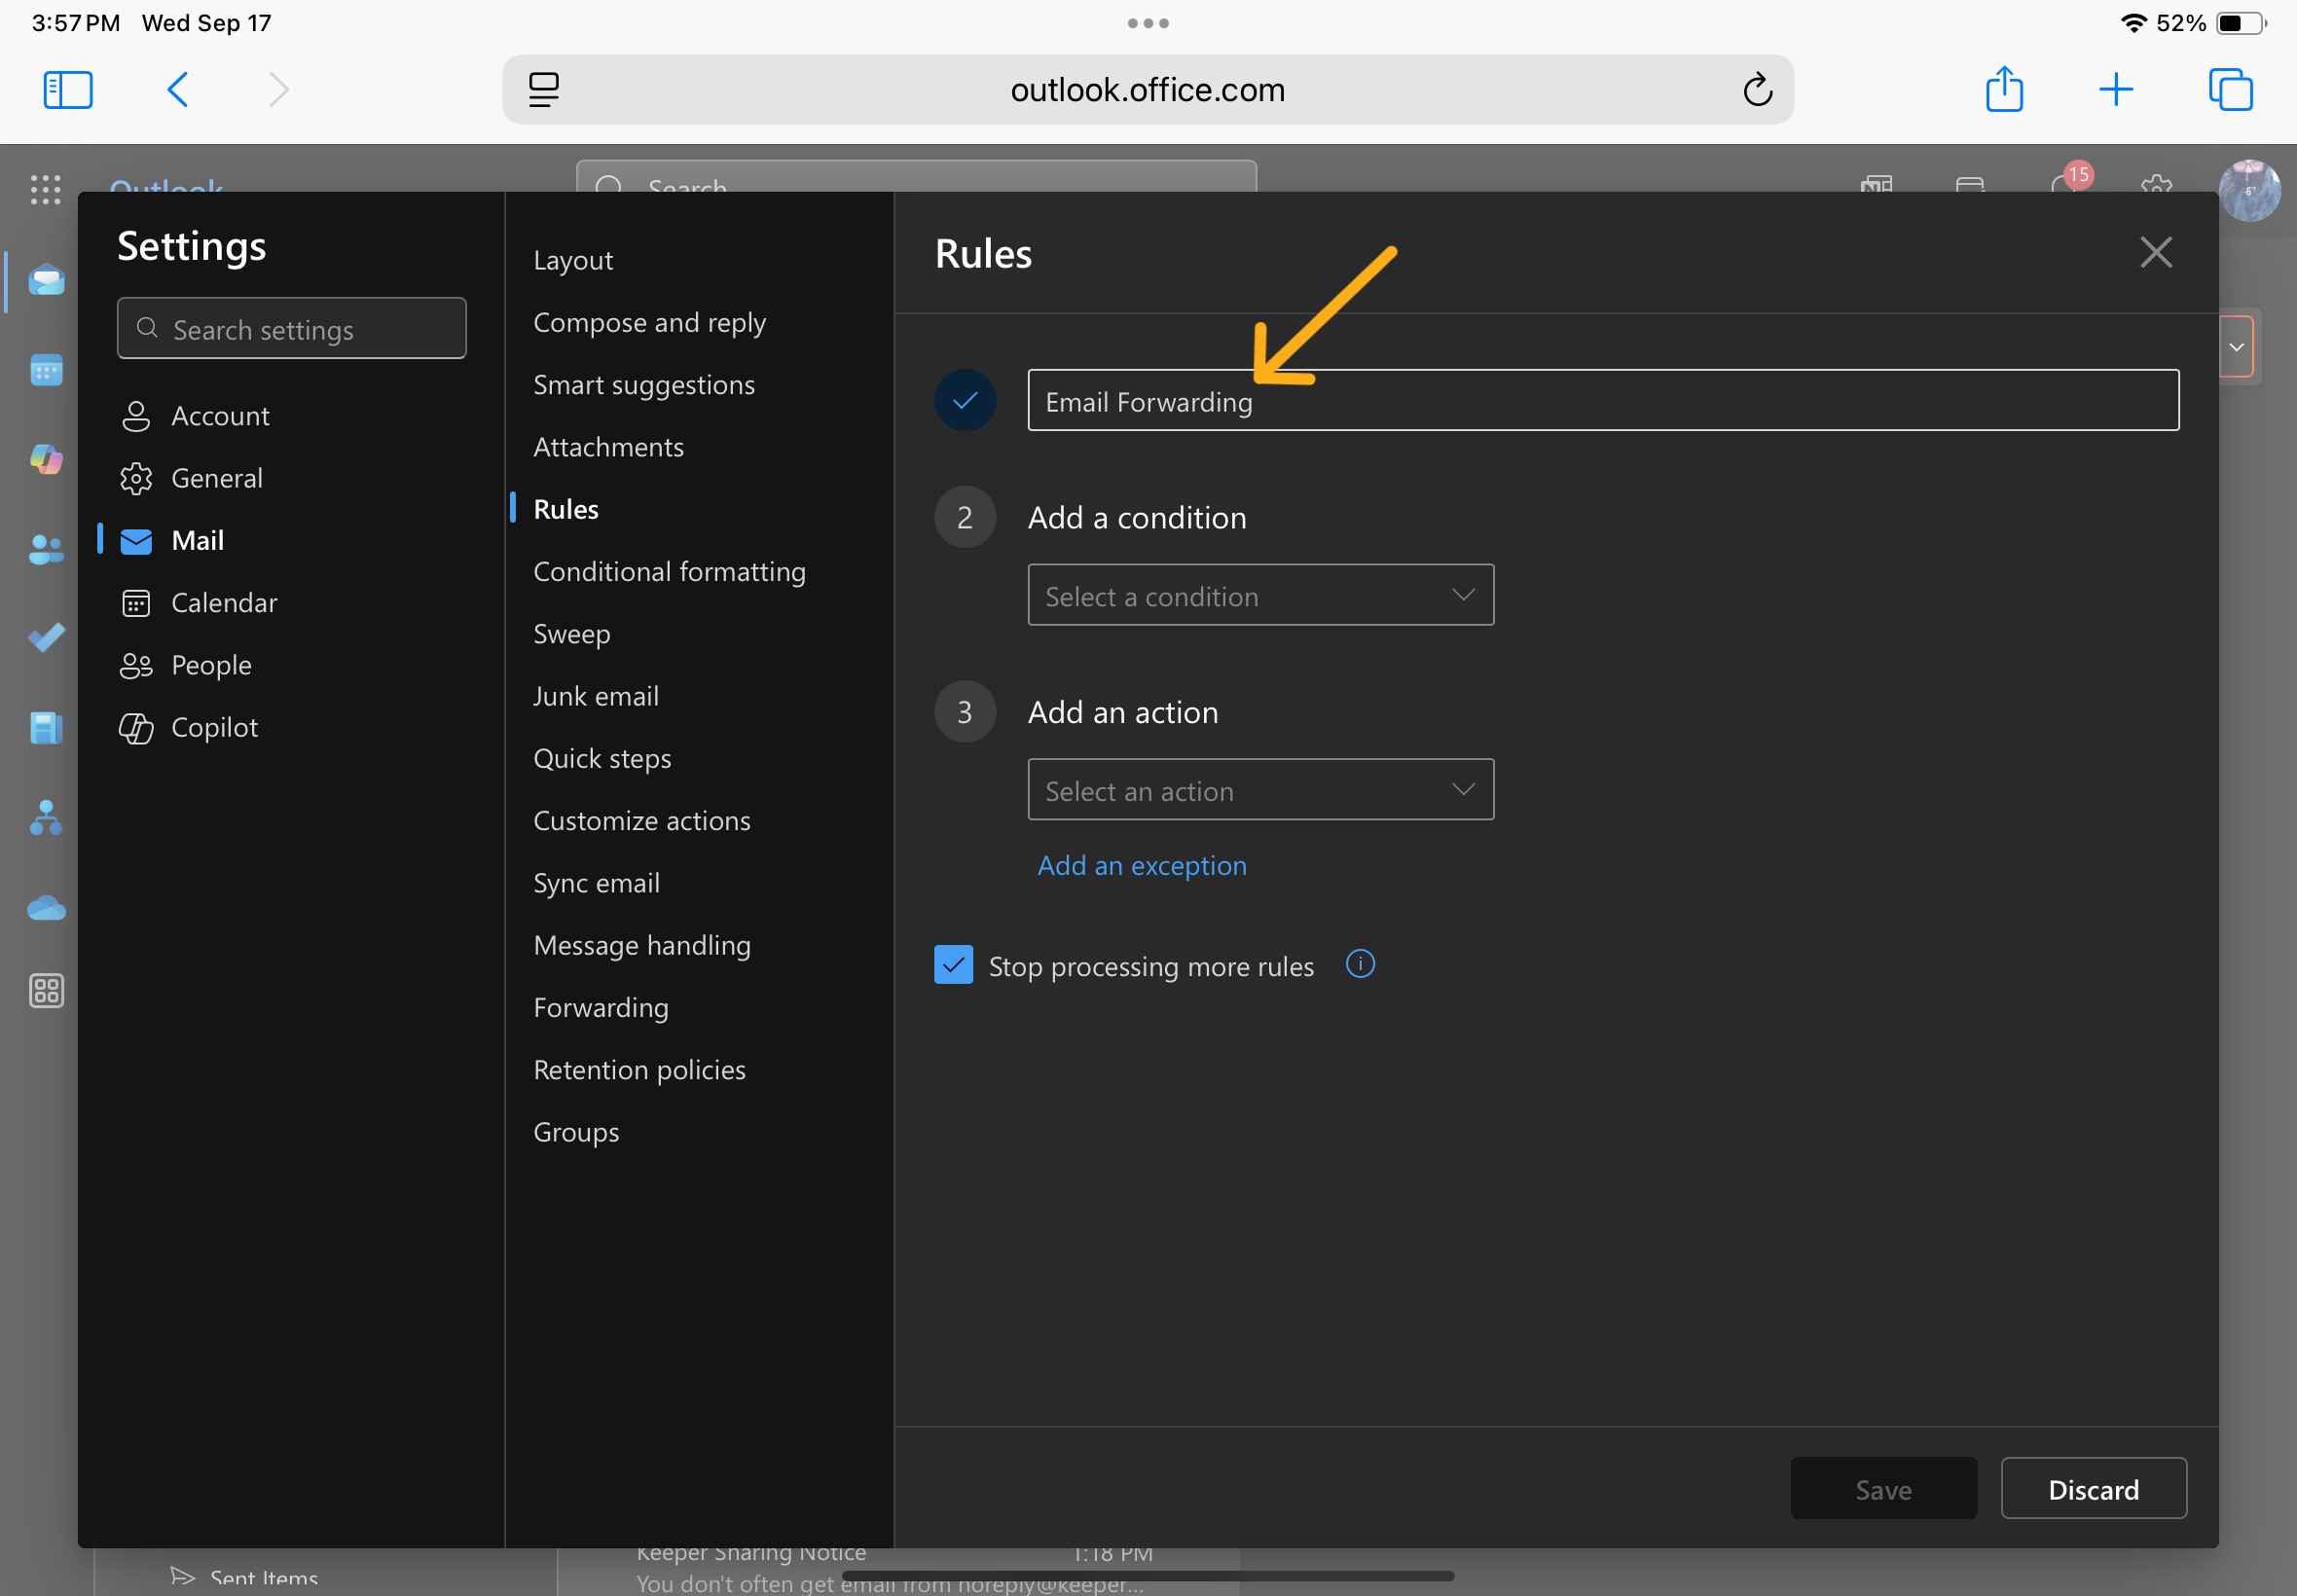
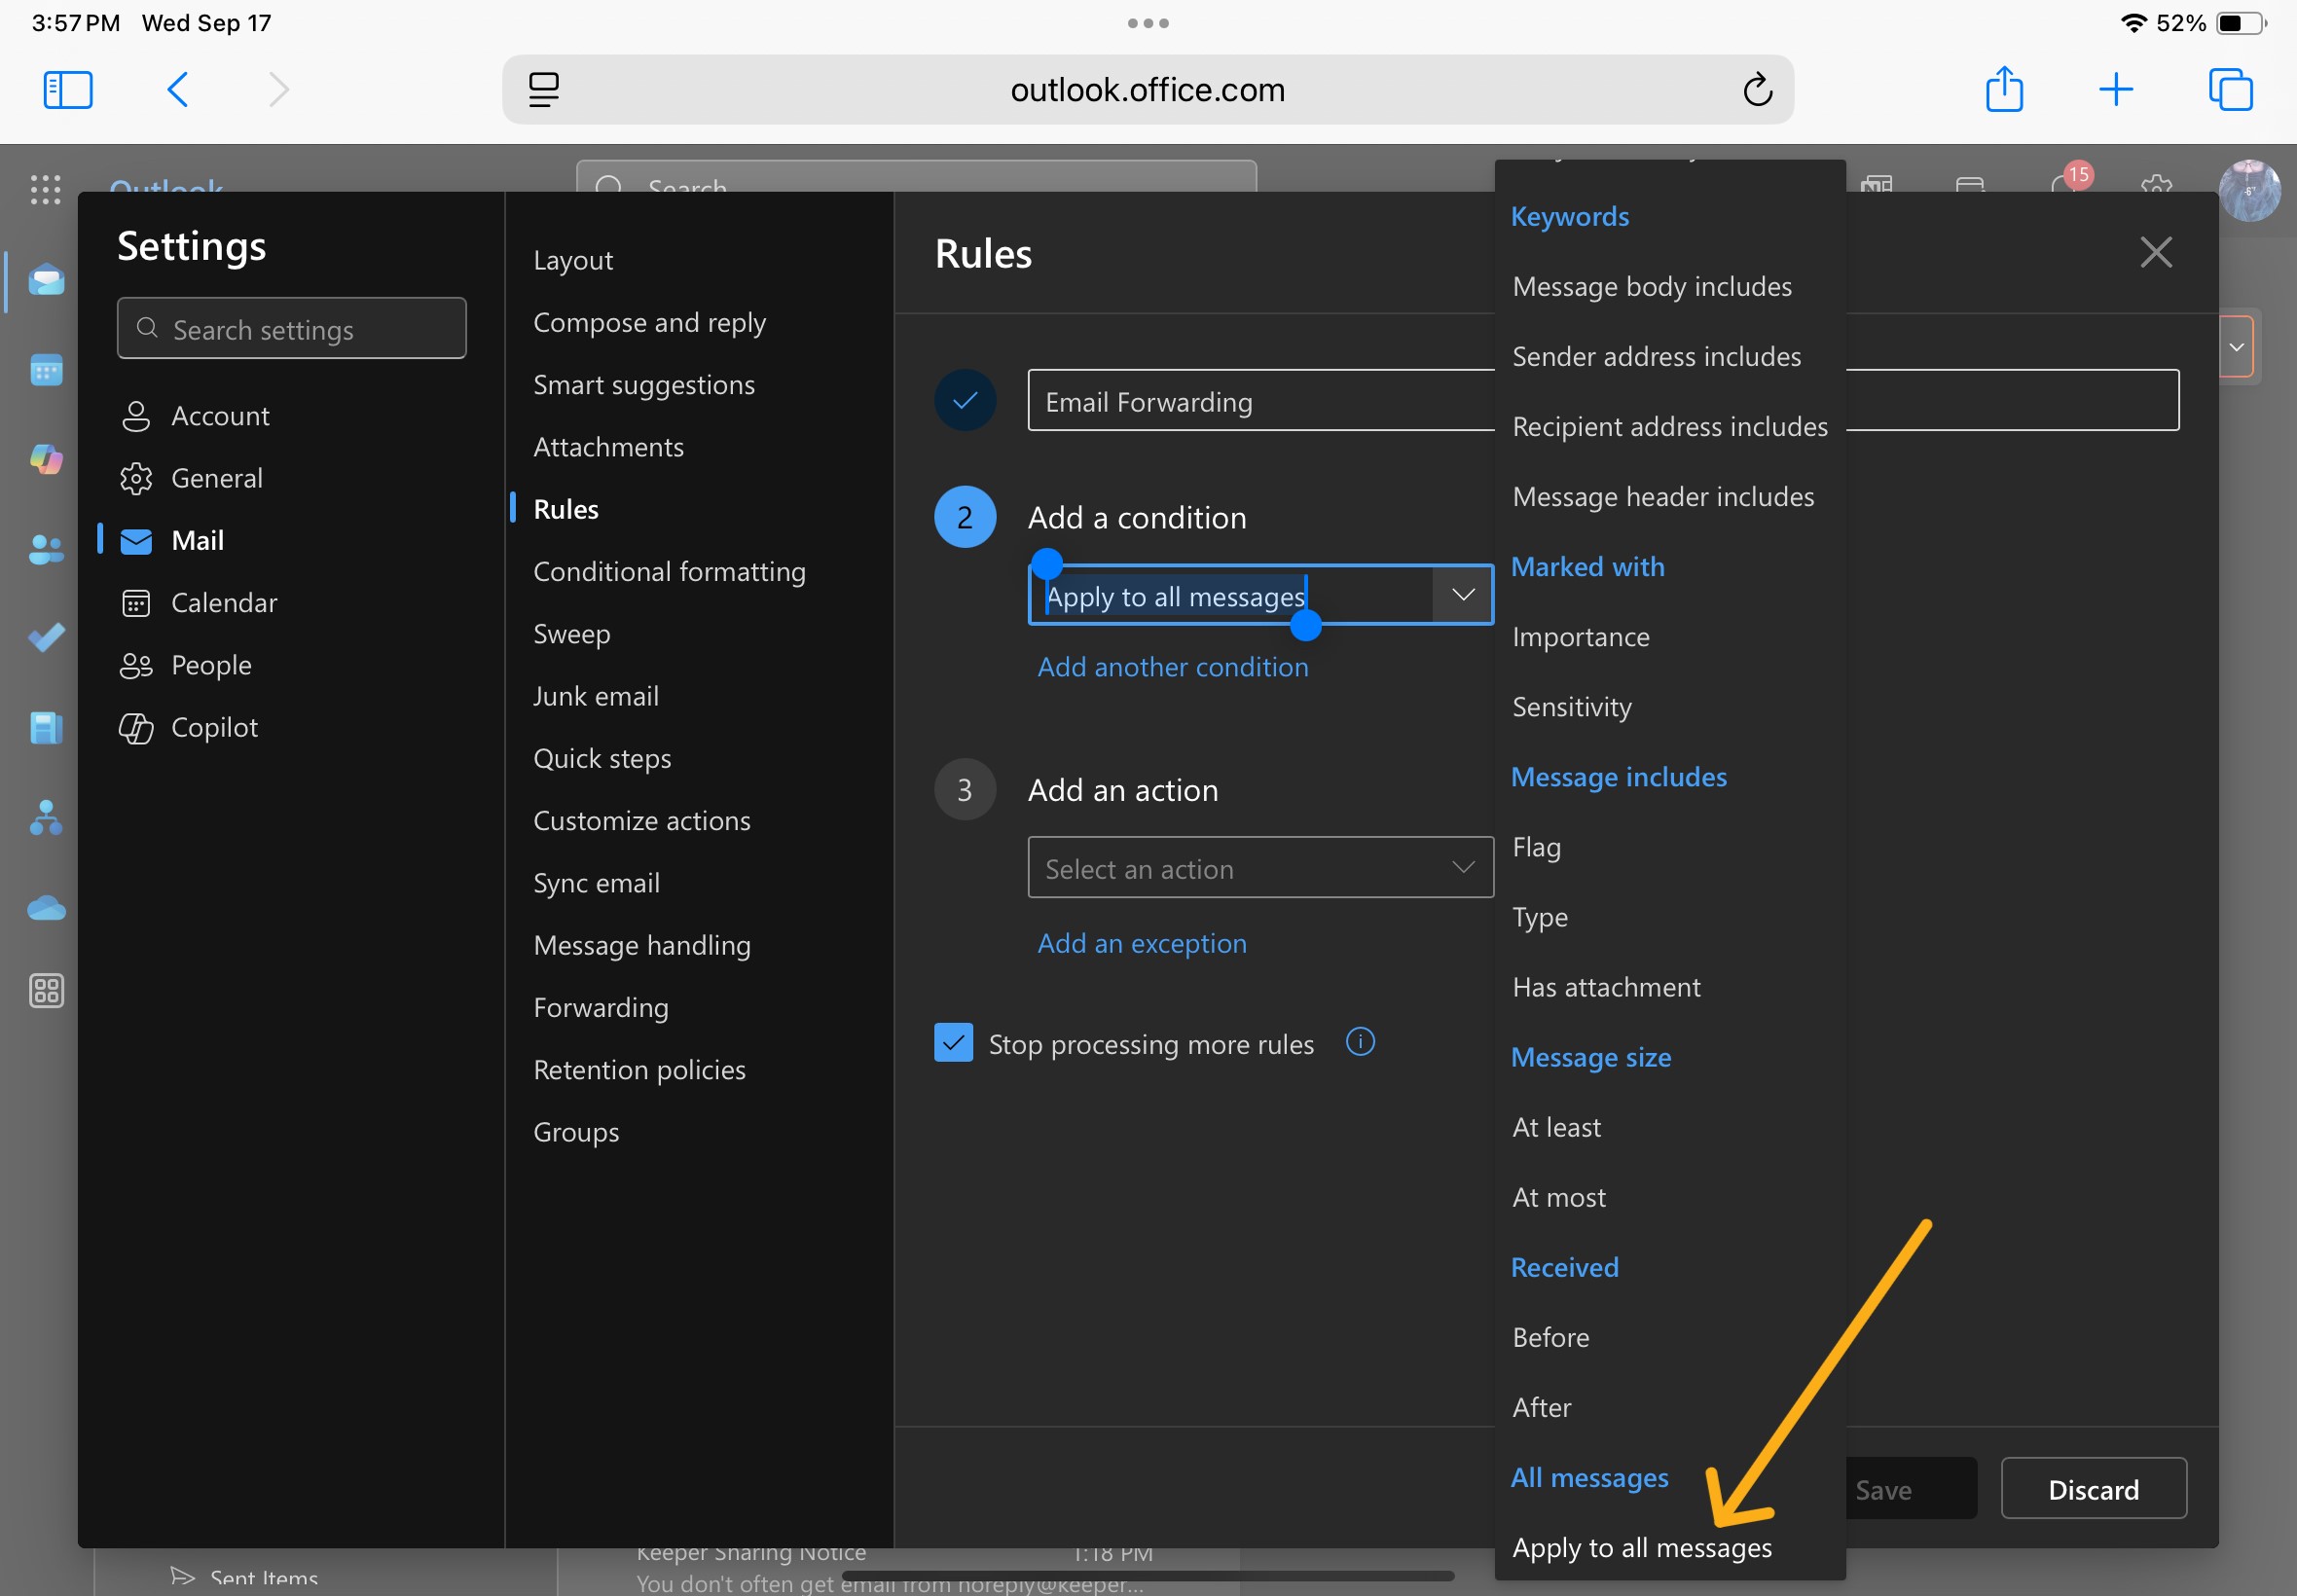
- In box 2, click the drop-down menu and scroll all the way to the bottom; select "Apply to all messages".
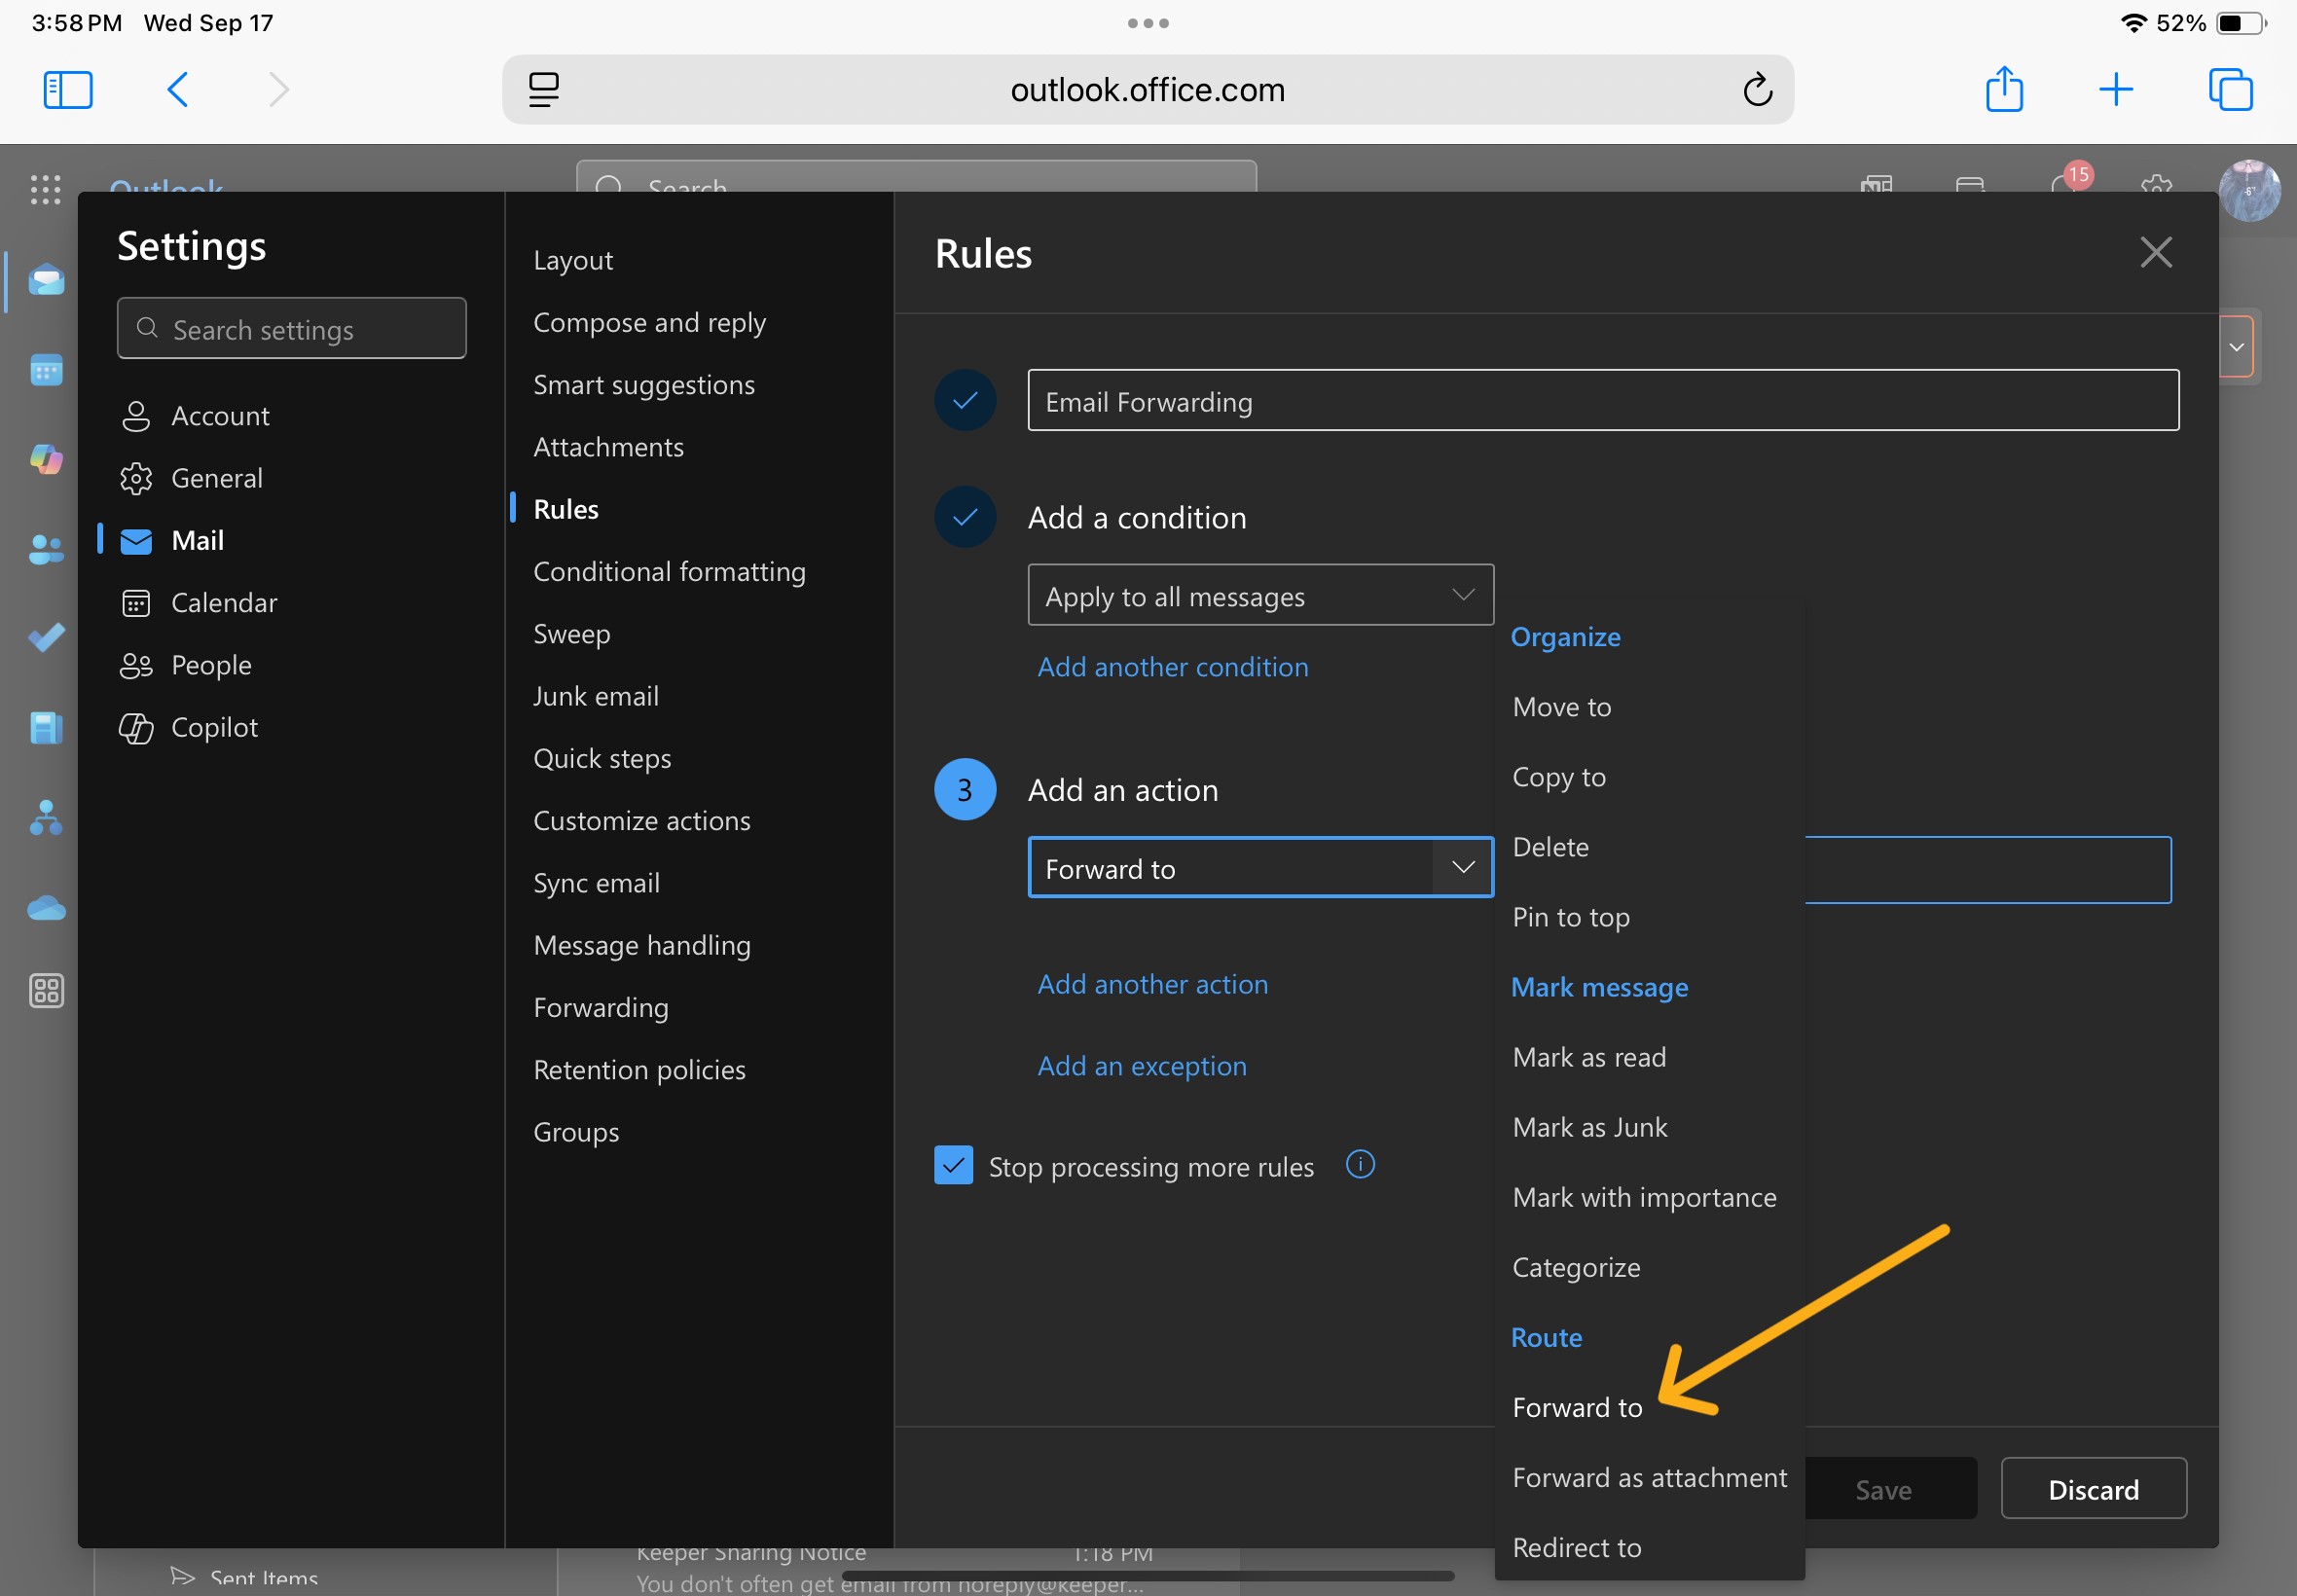
- In box 3, click the drop-down menu and scroll all the way to the bottom; select "Forward to".
In the empty prompt box, input the email address you would like to forward to.
If you are forwarding to an email outside of MSU, you will need to select "use this address" once entered.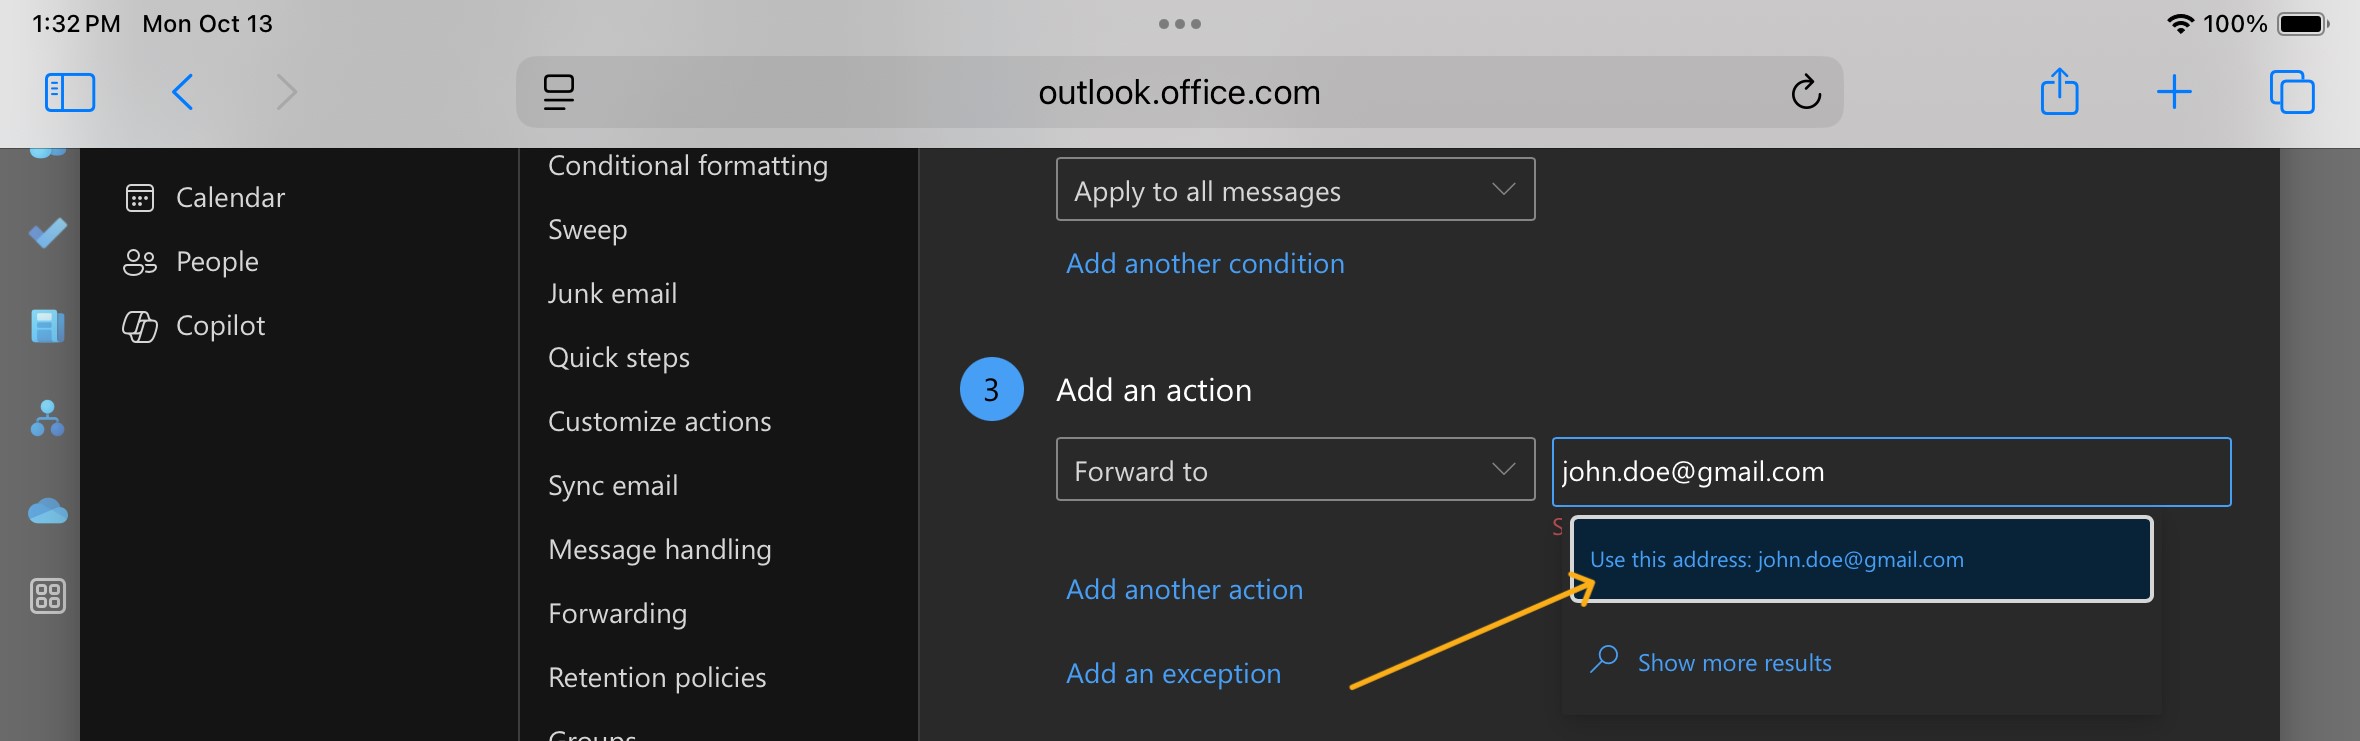
- Click the Save button to submit your new rule.
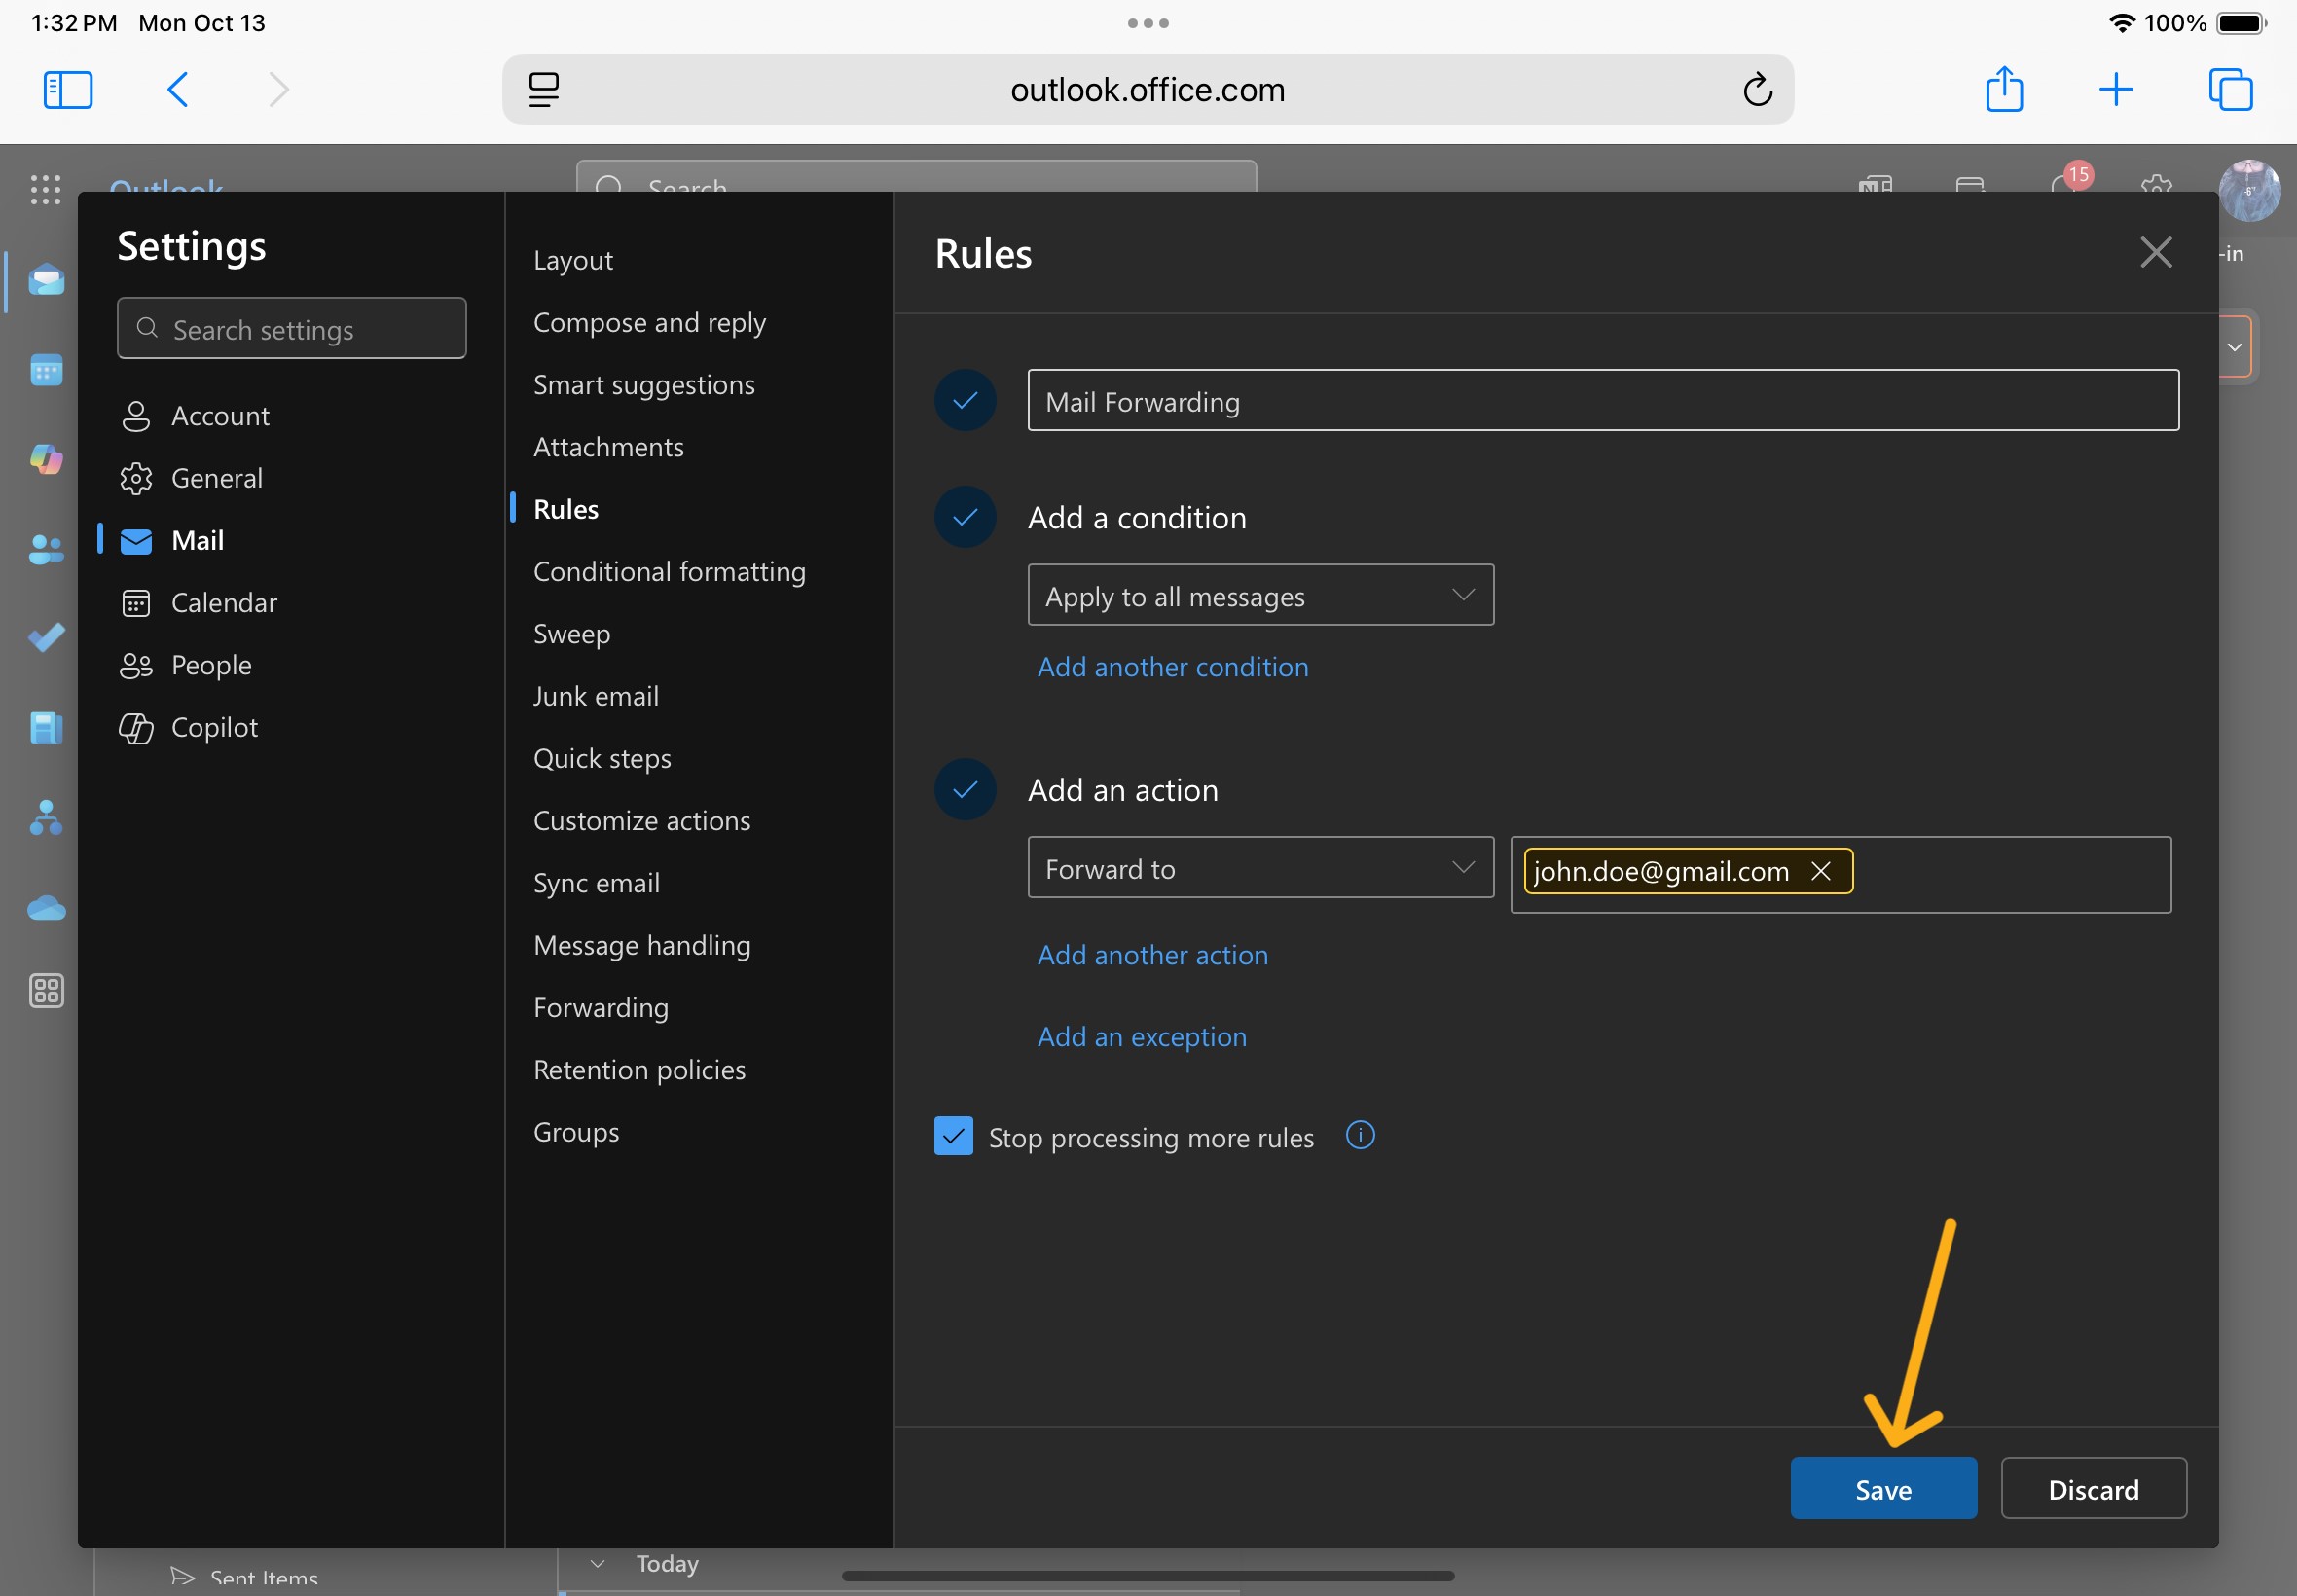
The rule should be listed, with the little toggle flipped to "enabled", in the Manage Rules window. You can disable rules at any time from this window.